Top 7 Reasons to Use NetSuite Bill Capture
- Automated OCR Extraction
- Email-to-Invoice Workflow
- Machine Learning Accuracy
- Unified Invoice Review
- Full Audit Trail
- Native NetSuite Integration
- Reduced Processing Time
Learn how to configure NetSuite Bill Capture — including its dependency on the Transaction Email Capture SuiteApp (Bundle 459771) — and explore why this tool is transforming invoice processing for A/P teams.
Step 1: Enable Required Features
Before configuring Bill Capture, make sure the correct NetSuite features are enabled:
- Go to Setup > Company > Enable Features.
- Under Accounting, enable Bill Capture and Accounts Payable (A/P).
- Under Company, enable File Cabinet.
- Under SuiteCloud, enable Custom Records, Client SuiteScript, and Server SuiteScript.
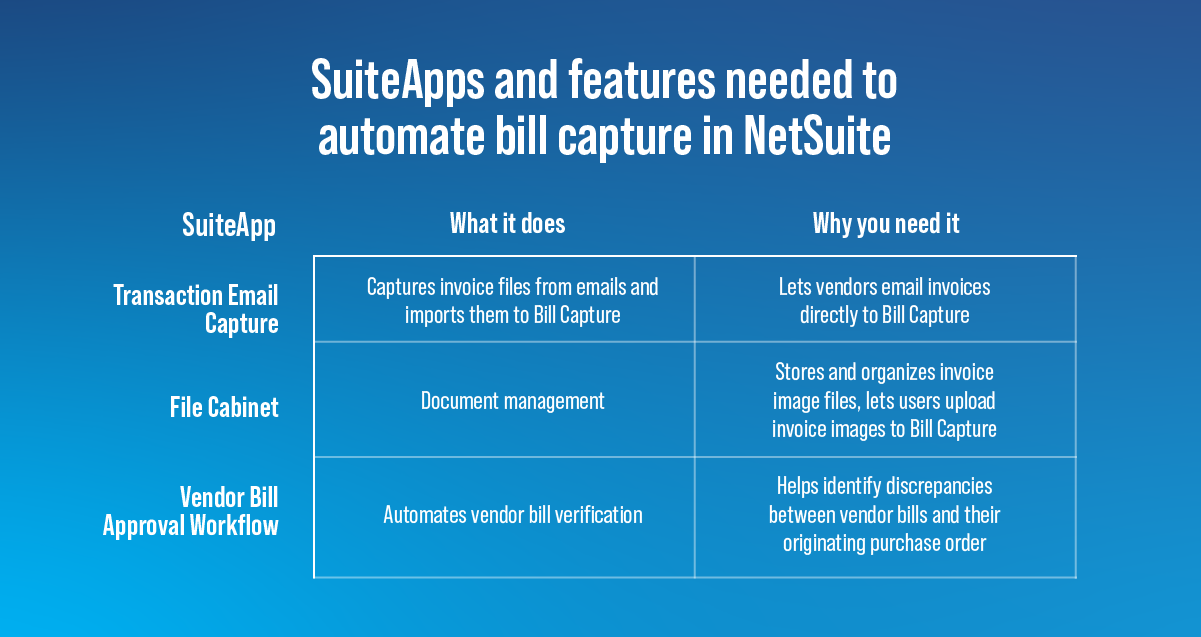
Important: The Transaction Email Capture SuiteApp (Bundle ID: 459771) must be installed and configured for inbound email functionality to work. Without it, vendor invoices cannot be automatically received by email.
Step 2: Install the Transaction Email Capture SuiteApp
Bundle Details
- Name: Transaction Email Capture
- Bundle ID: 459771
- Publisher: Oracle NetSuite
- Purpose: Enables inbound invoice email capture to feed NetSuite Bill Capture with vendor invoices automatically.
Installation Steps
- Log in with Administrator or Full Access.
- Navigate to Customization > SuiteBundler > Search & Install Bundles.
- Search for Transaction Email Capture or use Bundle ID 459771.
- Click Install and monitor the status.
- Once installed, configure the Bill Capture email integration.
Step 3: Assign User Permissions
Assign permissions to roles that will use Bill Capture:
- Documents and Files (Lists)
- Notes Tab (Lists)
- Scanned Vendor Bills (Lists)
- Bills (Transactions)
- Vendor Bill Sender (Custom Record)
Step 4: Configure Bill Capture Preferences

Navigate to Setup > Company > Bill Capture Preferences and configure your preferred capture method:
- Email Capture (via the SuiteApp)
- Manual Upload (drag-and-drop or file upload)
Set up your dedicated Bill Capture email address and vendor templates to improve OCR accuracy.
Step 5: Process Invoices Through Bill Capture
Vendor invoices can flow into NetSuite via:
- Email – Vendors send invoices directly to your Bill Capture email address.
- Manual Upload – Drag-and-drop invoices into the Bill Capture portlet.
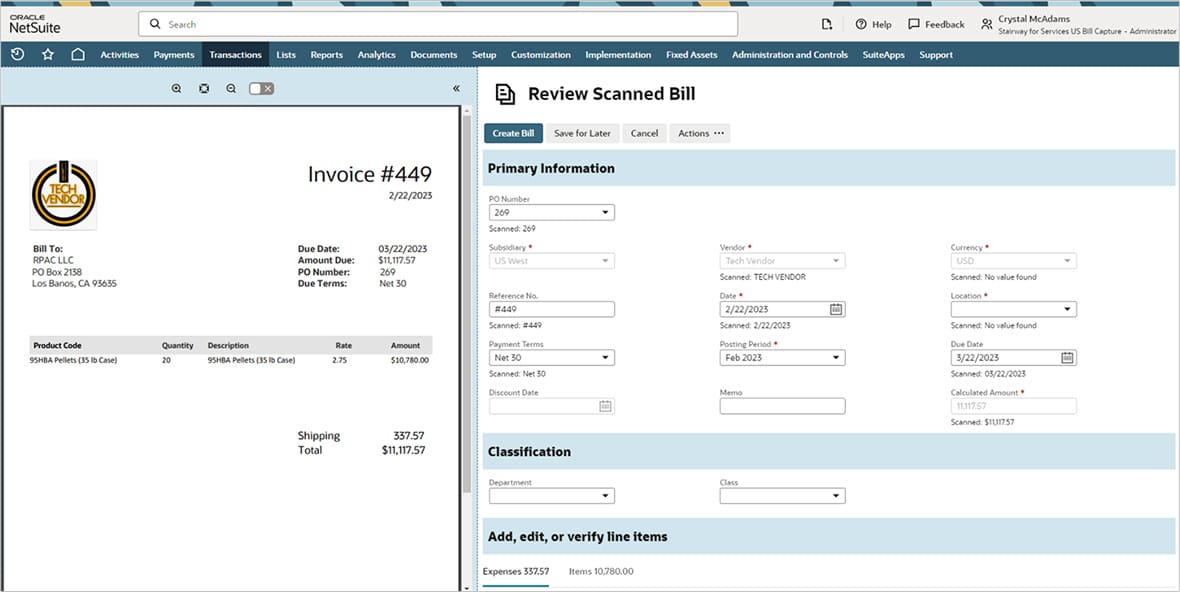
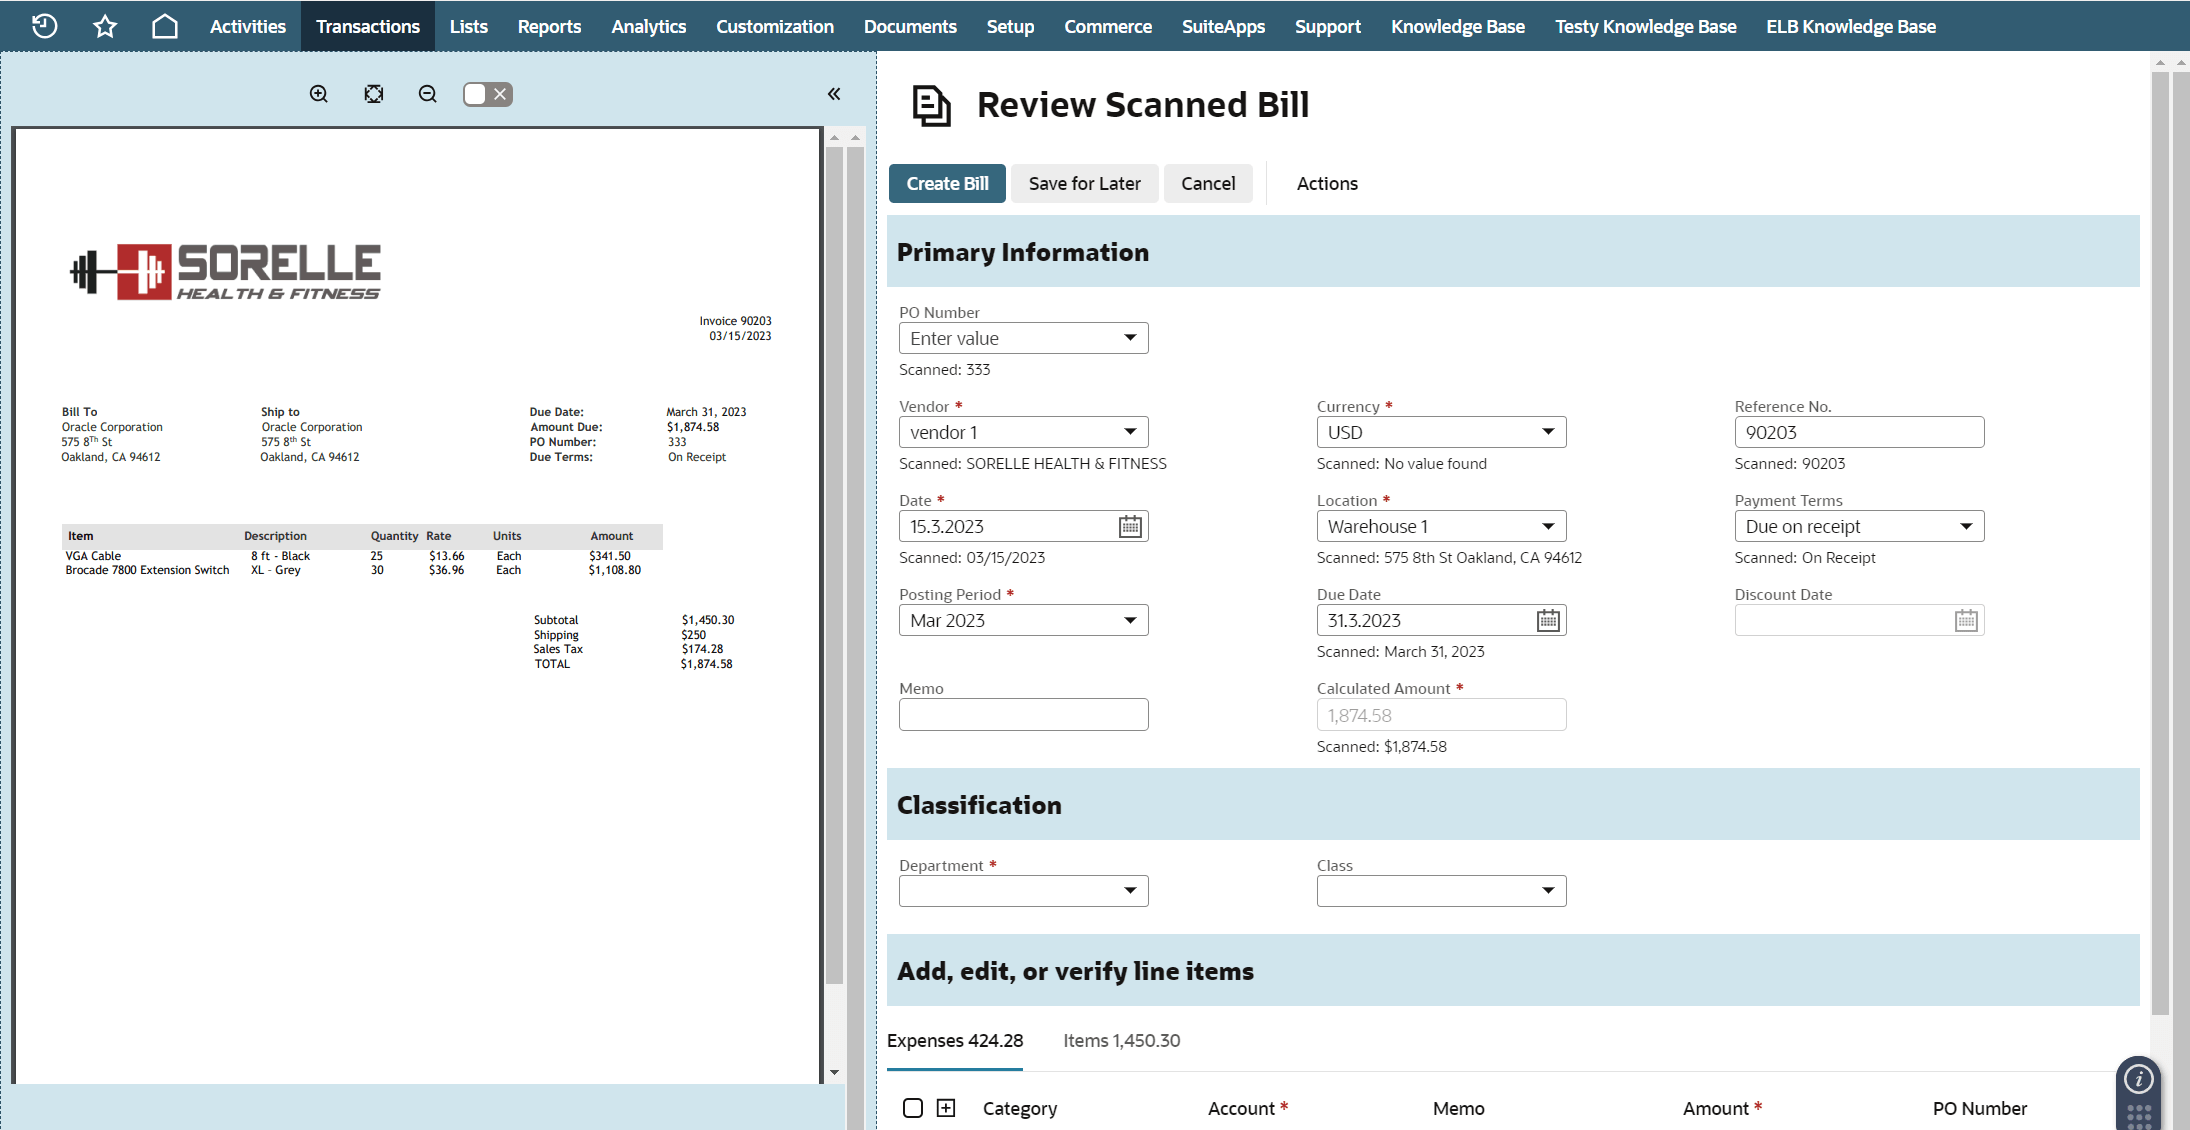
Once received, invoices appear in Scanned Vendor Bills where OCR extracts vendor names, PO numbers, and totals.
Step 6: Review and Approve Bills
Review extracted invoice data side-by-side with the original image. Make corrections — NetSuite’s AI learns from edits to improve accuracy. Once validated, create vendor bills and use approval workflows such as SuiteApprovals.
Step 7: Audit Trail and Compliance
Every vendor bill created includes a System Notes audit trail and stored invoice image, ensuring transparency and compliance.
Potential Shortcomings
- Limited OCR accuracy for complex invoices
- Dependency on Transaction Email Capture
- Limited customization options
- Possible processing delays
- Paid add-on licensing
- No automatic vendor confirmation
Conclusion

NetSuite Bill Capture revolutionizes invoice management by combining OCR, AI, and ERP integration. With the Transaction Email Capture SuiteApp (Bundle ID: 459771), it becomes a complete email-to-invoice automation solution for A/P teams seeking efficiency, accuracy, and control.